Baked cheesecake is a labor of love! It does require some planning, but it is well worth the effort! For a long time baking a cheesecake intimidated me. It had always been on my baking bucket list so I knew one day I would have to tackle it. Once I did, I realized it wasn’t as hard as I always thought it would be.
Here are a few tips and tricks for baking a cheesecake.
1. When adding the eggs into the cheesecake batter, turn your mixer on low and gently mix the eggs in. You don’t want to incorporate a lot of air while mixing or the cheesecake will crack while baking.
2. For a smooth satiny cheesecake, the cream cheese needs to be at room temperature.
3. The cheesecake has to cook low and slow. Don’t open the oven door while the cheesecake is baking. Your patience will pay off when you have a smooth and creamy cheesecake with out cracks.
4. It is important to run a knife around the edges of the cheesecake. This will prevent the cheesecake from cracking while it cools.
With love from my kitchen to yours,
Carrie

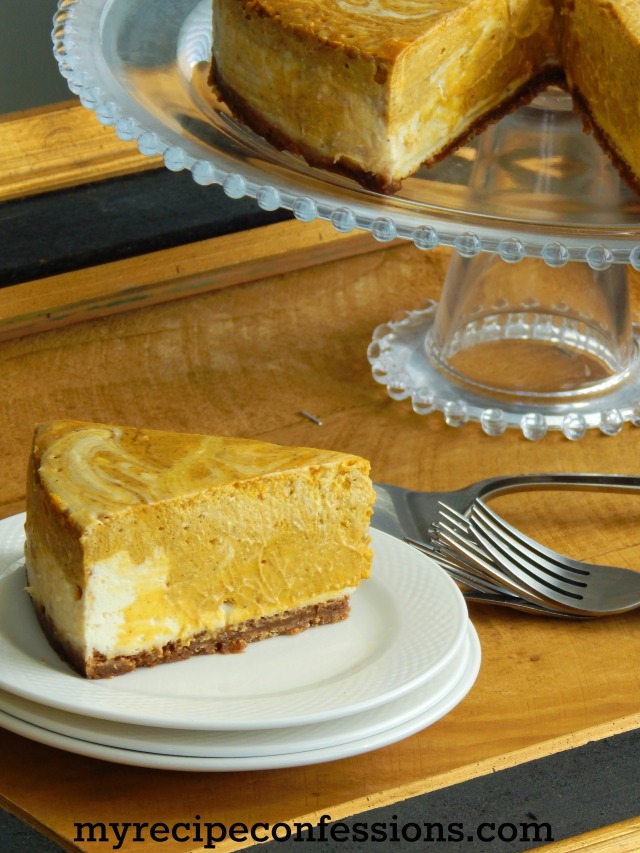
Marbled Pumpkin Pie Cheesecake
Cheesecake layer:
3 (8 oz.) pkg. of cream cheese softened
1 cup of granulated sugar
3 eggs
1 cup of heavy whipping cream
1 tsp. of vanilla
Pumpkin layer:
2 cups of pumpkin puree
1/3 cup of granulated sugar
1/2 tsp. of nutmeg
1 tsp. of cinnamon
1/4 tsp. of all spice
1/4 tsp. of cloves
2 cups of cheesecake batter
2 egg yolks
Crust:
2 cups of ginger snap cookies
1/4 cup of brown sugar
1/4 cup of butter, melted
Instructions
Preheat oven to 350 degrees
1. Blend the ginger snap cookies in a food processor until they are a fine crumb. Add the melted butter and brown sugar to the food processor and blend until it is combined well.
2. Press the crust mixture into a 10 inch spring form pan and bake for 10 minutes. Remove the pan from the oven and set aside. When the pan has cooled down a bit, wrap it with 3 to 4 layers of heavy aluminum foil (this helps keep the water out in the water bath).
3.Cream the sugar and cream cheese together. Mix in the heavy cream and vanilla. On low speed, gently mix in the eggs one at a time until the cream mixture is smooth and creamy.
4. In another bowl, mix the pumpkin puree, cinnamon, all spice, nutmeg, cloves, sugar, and egg yolks together. Mix in 2 cups of the cheesecake layer batter into the pumpkin mixture.
5. Pour half of the cheesecake batter into the spring form pan. Next pour the pumpkin batter over the cheesecake batter layer, then pour the remaining cheesecake batter on top.
6. Gently drag a butter knife through the batter to create swirls. Place the wrapped spring form pan in a larger roasting pan. Pour boiling water in the roasting pan until it is 1/2 way up the side of the wrapped spring form pan.
7. Bake the cheesecake at 350 degrees for 30 minutes. Reduce heat to 250 and bake for one hour or until the cheesecake is almost set (still a little jiggly in the center).
8. Turn off the heat and leave the cheesecake in the oven for an additional 30 minutes. Remove the cheesecake from the oven and slide a knife all the way around the outside of the cheesecake to loosen the edges.
9. Let the cheesecake cool to room temperature, about 4 hours. Place the cheesecake in the refrigerator and chill for 5 to 6 hours. Run the knife around the edge of the pan one more time before removing the side of the pan.
10. To cut the cheesecake, use a hot clean knife. After each cut, dip the knife into the hot water again and dry it off. This will insure nice clean lines in your cheesecake.


