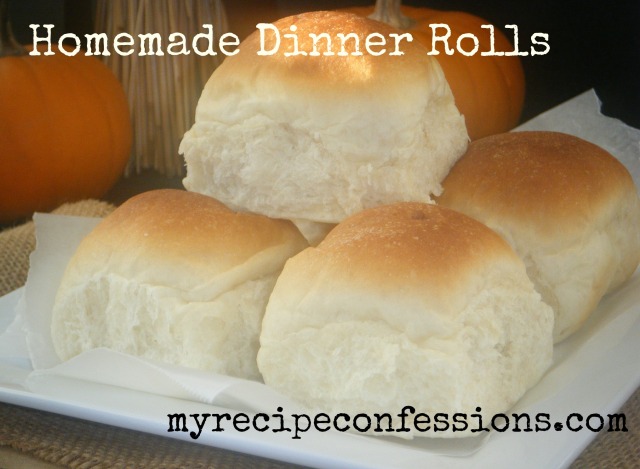
My mom is from Argentina. Every morning when she was growing up, a man with a cart of fresh bread would walk down the street by her house and sell the freshly baked bread. As you can imagine, my mom has a deep love for fresh bread. She passed that love on to me. One of my favorite smells is the smell of homemade bread. It brings back all kinds of childhood memories for me. When ever I make these dinner rolls my kids stay close to the kitchen. As soon as I pull them out of the oven they are begging for one.
This roll recipe is very versatile. I use it for cinnamon rolls, orange rolls, sticky buns, butterflake rolls, cloverleaf rolls, and dollar rolls. When I make the dinner rolls, I roll the dough into a long rope and then cut the dough into 2 inch sections (you should get about 36 total). Then I pull the top and sides down to the bottom until it forms a tight ball.
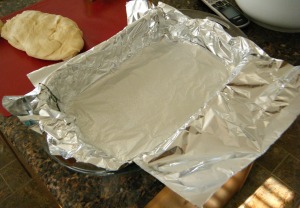
I like to use a baking dish that is around about a 9 by 13 pan. One 9 by 13 pan fits twelve rolls. So if you don’t have a larger baking dish or three 9 by 13 pans, you can use a baking sheet. Line the pan with two strips of aluminum foil length wise so that the foil hangs over the side of the pan about an inch. Then line the baking sheet with two more strips of foil going width wise with a about a inch hanging over the side also. Fold the extra foil over the sides. Spray the foil with baking spray.
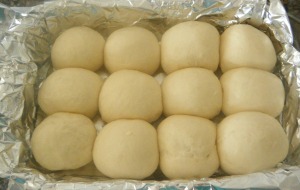
Place the balls of dough about an inch apart in the pan. Spray baking spray on two sheets of plastic wrap that is the same width and length of the pan then place it over the rolls in the pan.
Place the pan in a warm place and let the rolls rise until double in bulk. You want them to be touching. This will keep them soft during the baking process.
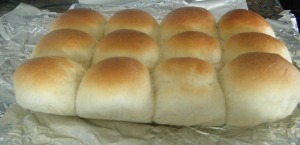
Remove the plastic, place the rolls in the oven, and bake until they are golden brown ( about 15 to 20 minutes).
When the rolls are finished baking, pull them out of the oven and let them cool down for about 5 minutes. Then lift the foil and the rolls out of the pan and pull the foil away from the rolls so they can finish cooling.
Go ahead and give these rolls a try. You will be so happy you did! They will make a perfect addition to your Thanksgiving Dinner.
Until next time,
Happy Eating!
Carrie
Homemade rolls
2 Tbsp. dry yeast
2/3 c. butter, softened
1 c. instant mashed potatoes (1 cup of flakes & 1 cup of water)
1 ½ tsp. salt
1 ½ c. warm water
2/3 cups of sugar
2 eggs
6 to 7 cups of flour
Dissolve yeast in warm water in large bowl. Stir in potatoes, sugar, butter, eggs, salt, and 3 cups of flour. Beat until smooth. Mix in enough remaining flour to make dough easy to handle. Turn dough onto lightly floured surface; knead until smooth and elastic (about 5 minutes). Place in a greased bowl and let rise until double in bulk. Shape rolls, let rise, and bake in oven at 350 degrees until golden brown. Brush hot rolls with melted butter.
This recipe is link to:


Carrie, Where do you put your dough to rise? Not sure where to find a warm enough place for rising purposes. I have heard placing your bowl on a warm heating pad works. Have you tried this method?
LikeLike
Barb,
I haven’t ever tried the heating pad method. I imagine it would work just fine. I have placed it in a oven that was set at 200 degrees. If you are in a hurry you could try that. I don’t like this method as much because I think it slightly changes the texture of the bread. A lot of times I will set the bowl with the dough on my stove top while I am preheating my oven. Really as long as it is in a draft free spot it will be just fine. I hope this helps. If you have any other questions don’t hesitate to ask.
LikeLike
Carrie, Just came by to say hello and take a look, you are on the right path this post is beautifully written and your pics are much better than mine where when I started keep plugging and just do what you can, you will get there!
LikeLike
Kelley,
Thank you so much! It is so nice to be able to get advice from somebody who has been in my place before. You are such a sweetheart!
LikeLike
Yum I love home made rolls. I’m going to make these for sure.
LikeLike
Joann,
These are Dave’s favorite rolls. I don’t make them very often but when I do he eats a bunch.
Let me know what you thing of them.
LikeLike
Your rolls look amazing! They look just like store bought rolls but I’m sure they taste twice as good! I am going to make these for sure! How do you get them to be so perfectly round on top?
LikeLike
Stephanie,
To get them round on top when you are shaping the dough you have to pull from the top center of the dough and pull it to the bottom. I just repeat this until it is smooth, round and tight. It takes a few times of trying this technique to get the hang of it.
LikeLike
these look so yummy and i can’t wait to make them. I was just wondering if you meant 1 1/2 c. of warm water instead of warm milk…I am not much of a baker so I wanted to make sure before I followed through with the recipe. Thanks 🙂
LikeLike
Jess,
Thanks for stopping by. You really can use either water or milk in this recipe. If you don’t have any milk you can substitute it for 1 1/2 cup of warm water. I hope you enjoy the rolls!
Carrie
LikeLike
super awesome…thanks so much!!! I ended up using water bc I don’t have enough milk. I am about to put them in the oven and they look awesome. Thanks for your speedy response!
LikeLike
Made these rolls this weekend…my first attempt at dinner rolls. Your step-by-step directions with pictures were so helpful. The rolls were delicious. Thanks so much.
LikeLike
Hello,
On your recipe it says to add butter, margarine, eggs etc etc but there is no margarine In the ingredients I didn’t know if that was a typo or and either or kind of thing just wanted to make sure before I make them!
Thanks,
Kara
LikeLike
Kara,
I use to use both margarine and butter in the recipe. I have since found that I like using just butter. I guess when I posted the recipe I must have missed that. Sorry! I hope you have a great Thanksgiving!
Carrie
LikeLike
How long does each rise approximately take? Is it possible to freeze the dough after the 2nd rise before baking?
LikeLike
Jana,
It all depends on how warm your house is. Mine usually take between 30 to 45 minutes. You just want them to be double in bulk. An more than that and it will start to effect the flavor. I wouldn’t freeze them after they rise for a second time. If you want to freeze them to use them later shape them and then freeze them after you mix the dough up. There really is no reason to let them rise if you are not going to be using them right away. I hope this helps. If you have any other questions, don’t hesitate to ask.
Carrie
LikeLike
Pingback: 20+ of the Best Roll Recipes
Thanks for adding me to your round up!
Carrie
LikeLike
Pingback: 20+ of the Best Roll Recipes